Brioche Hot Dog Buns
Ingredients for 12 buns
525g hard white wheat
160g whole milk
160g water
1 egg
1 egg yolk
60g sugar
4g amylase (optional)
5g vital wheat gluten (optional)
10g yeast
7g salt
50g softened butter
Combine the water, milk, flour, egg, yolk, sugar, amylase and vital wheat gluten. Autolyse for 30 minutes. You can save the leftover egg white to use as the egg wash.
I like to pre-weigh my yeast, salt and butter and place it in an obvious place so I do not forget to add it in later!
Add your yeast, salt and butter and mix until combined. I do not recommend adding the butter before the autolyse step as the oils will coat the flour, preventing it from properly hydrating.
Begin to knead your dough by hand or with a mixer. The dough will be sticky but do not add more flour as this will throw off the hydration levels. If you are kneading by hand use the slap and fold method to help with the sticky dough.
It is essential that you reach a windowpane. You can see a video on windowpanes here.
I find if you are using a kitchen aid mixer, if you do not have enough dough it will end up just going for a ride in circles. To fix this I either turn up the speed to three or four so the dough is pulled away from the hook allowing it to catch, or scaling my recipe up so I have more dough. These buns freeze very well so I tend to scale up and just make a big batch. Please be aware that Kitchen Aid does not suggest mixing over level 2 with doughs to protect the motor so do so at your own risk and keep an eye on if it is getting warm. I personally have never had an issue.
Once you have reached a windowpane, cover and allow the dough to rise until almost doubled. This will take about 45 minutes to an hour. Place the dough into the fridge for 1 hour and up to 12 hours. This will allow the butter to stiffen and make the dough easier to shape.
On a clean work surface, turn out the dough. I do not recommend flouring the surface as we will be using the surface tension to shape the dough. Instead you can use a bench scraper if it is sticking. Watch a tutorial on shaping here.
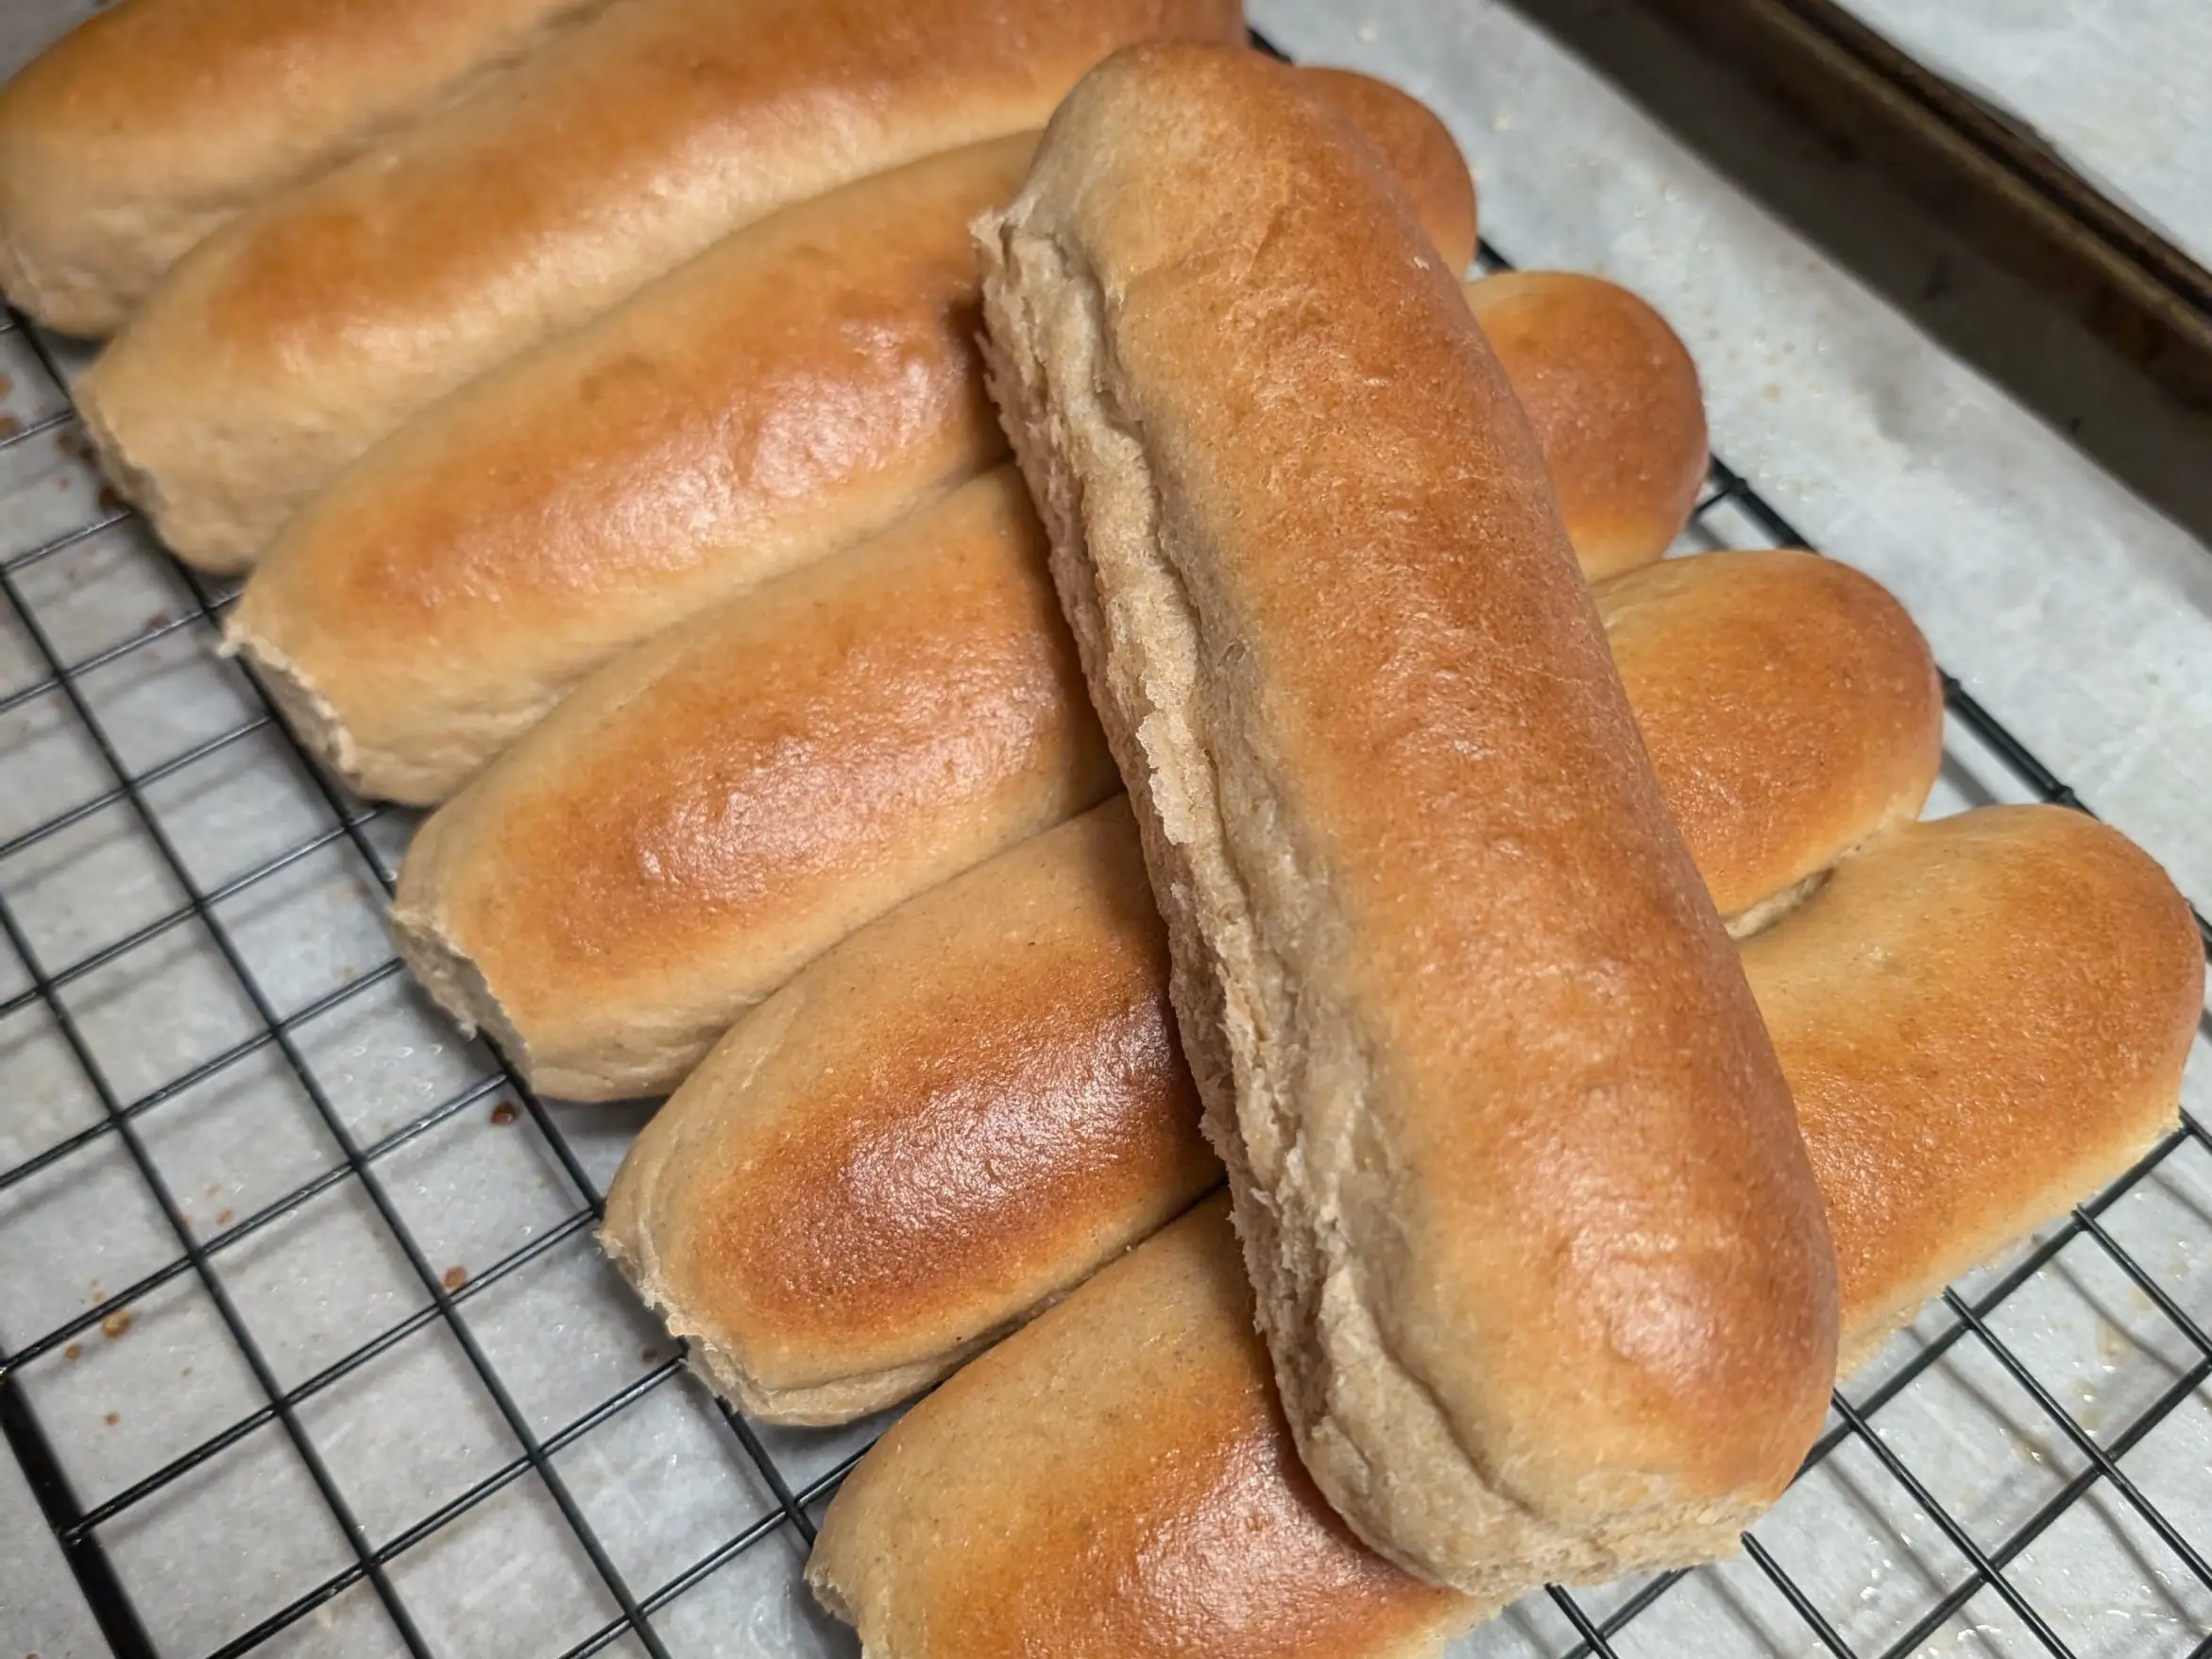
Divide your dough into 12 even pieces, 80 grams each. I like using a scale to ensure the finished buns will be the same size. Take one portion of dough and spread in into a rectangle about 4" by 4". Take the top edge and roll it down about an inch. With your finger tips lined up along the rolled edge, gently roll it down and back to create tension. Place your fingers back at the top of the rolled edge, roll forward another turn, pressing down and back. Repeat until you have rolled it all the way up. Pinch the seam and then roll into a 6" long log. Place onto a parchment lined baking sheet. Repeat with all the pieces placing them 1" apart on the baking sheet. This will allow them to rise and press into each other, forcing the rise to go up instead of out and creating those pull apart buns we all know and love! Cover and rest for 45 minutes to an hour or until tall and a poke test comes back slowly and not completely.
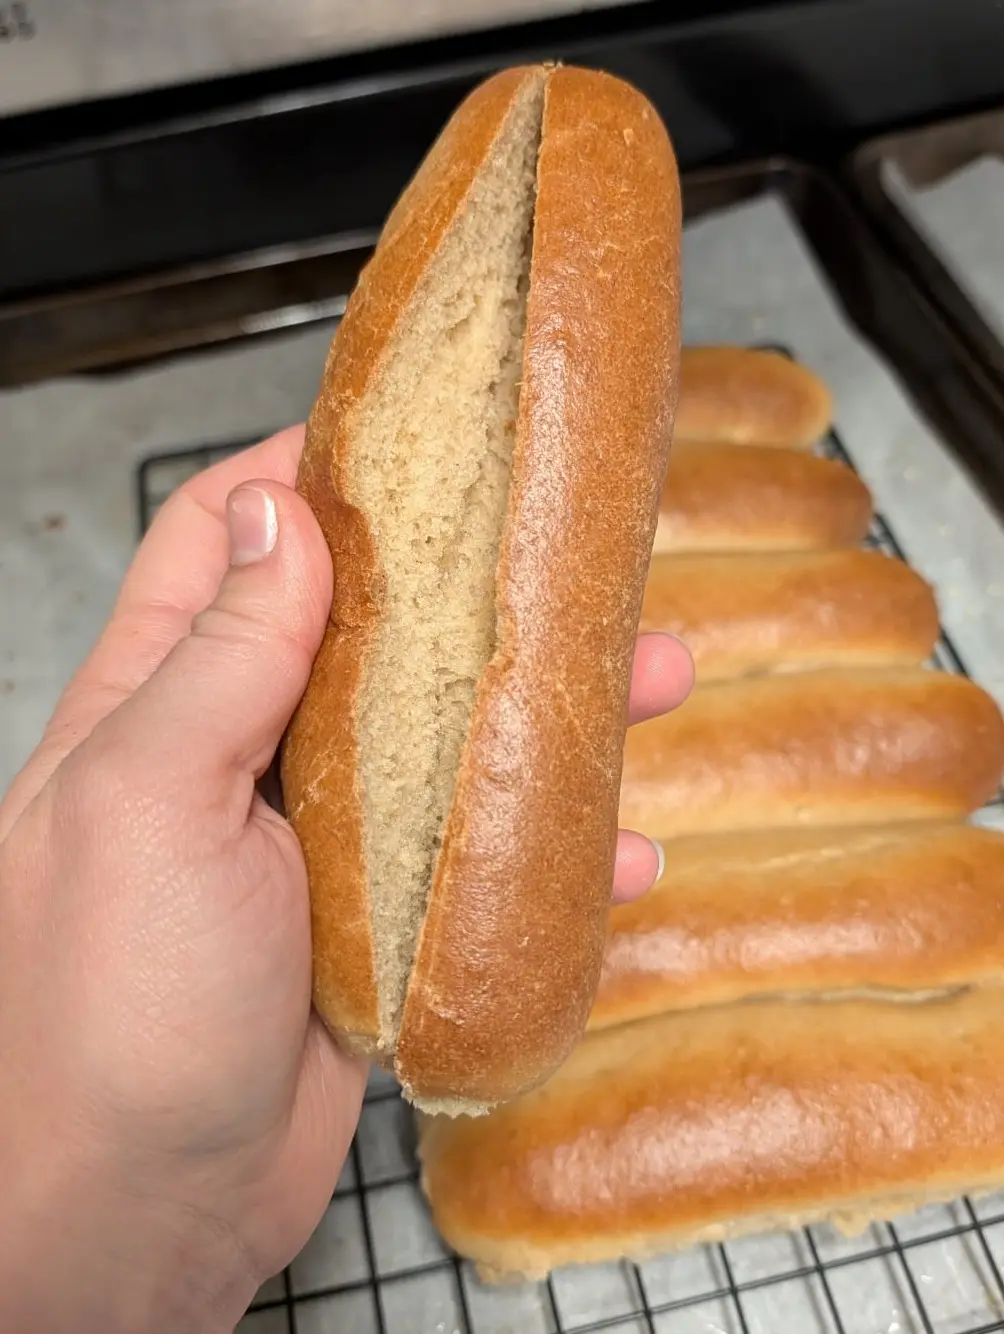
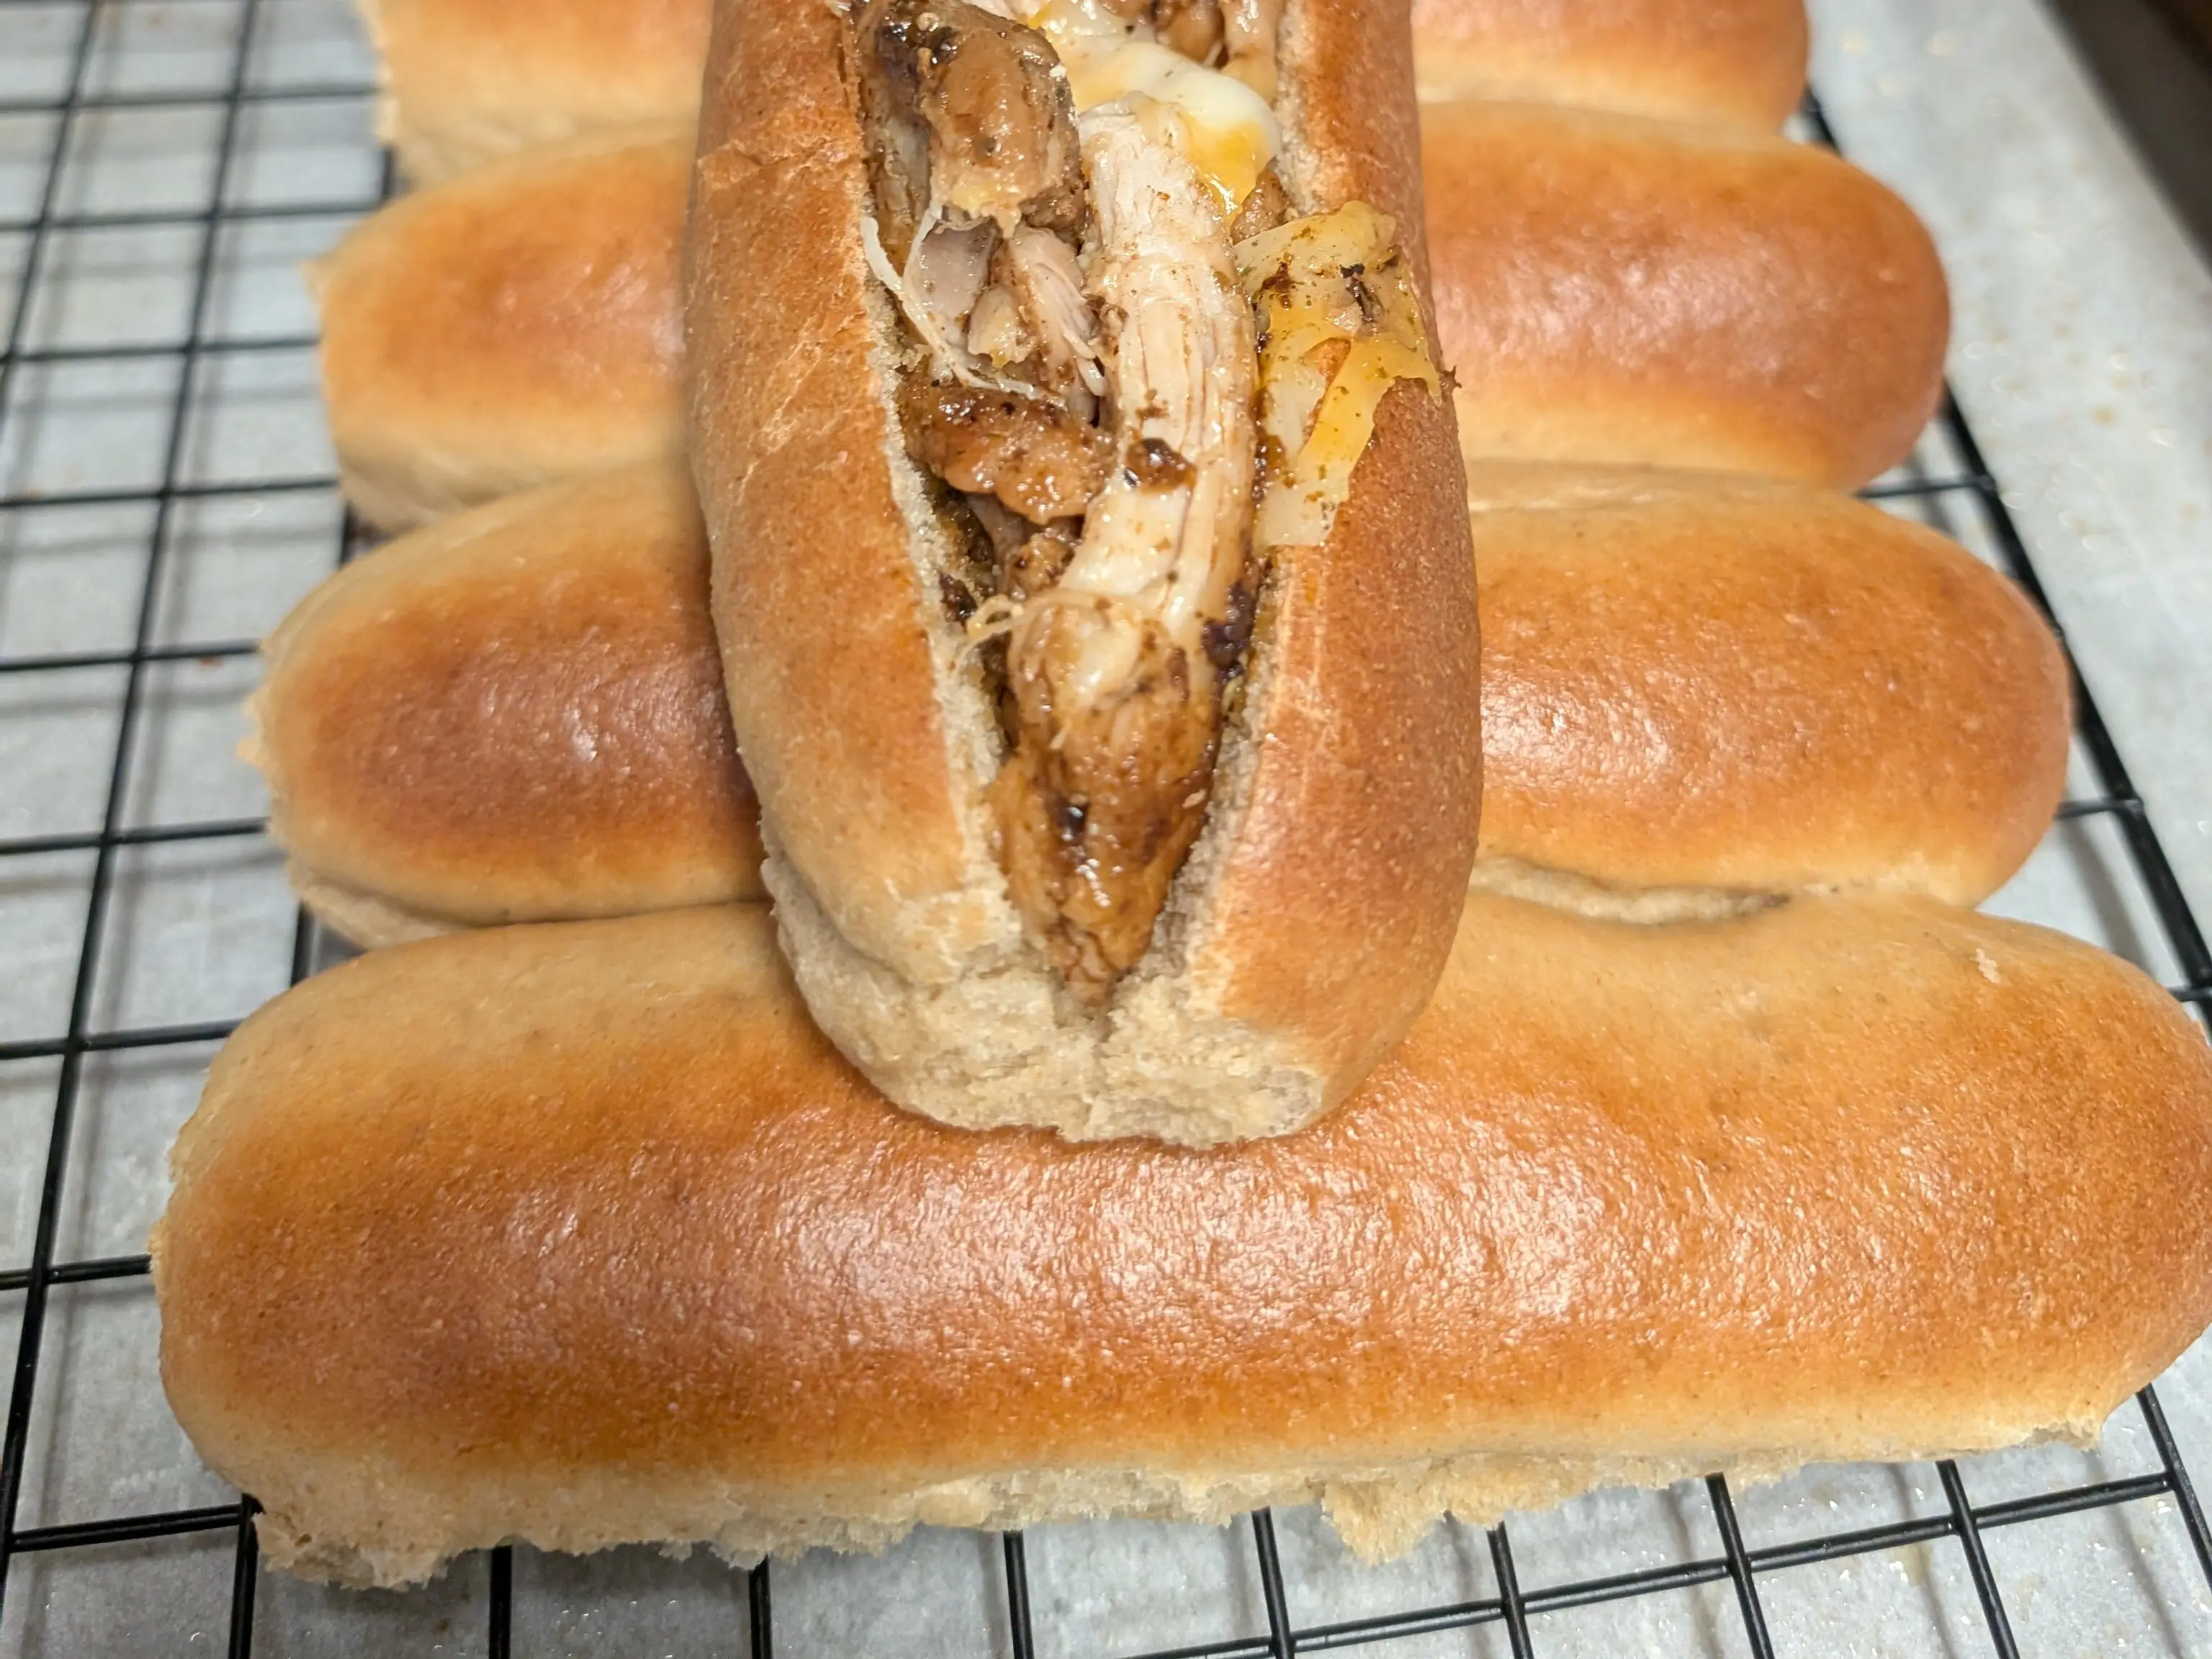
Preheat your oven to 375. Using the leftover egg white, add 1 tablespoon water and a tablespoon honey if you want a sweet finish. Wisk and then brush over the rolls. While the egg wash is still wet. Bake for 15 minutes or until the internal temperature reads 200 degrees. Cool completely before slicing the top of each bun about halfway through.

Drag and Drop Website Builder